
Avoid Costly Painting Mistakes During Home Remodeling Projects

A fresh coat of paint has the power to completely transform a space—but during a remodeling project, it can just as easily become a source of frustration and unexpected cost. Many homeowners assume painting is one of the simpler parts of a renovation. In reality, it’s often where small missteps compound into visible flaws, delays, or expensive do-overs.
Whether you’re updating a single room or reworking your entire home, painting sits at the intersection of timing, preparation, and coordination. Done right, it ties everything together. Done poorly, it highlights every imperfection.
This guide walks through the most common painting mistakes people make during remodeling—and more importantly, how to avoid them with practical, real-world strategies.
Building a Clear Plan Before Painting Begins

When homeowners rush into painting without a defined roadmap, they often end up repainting surfaces multiple times. The issue usually isn’t the paint itself—it’s the lack of coordination with the broader project.
A well-organized plan starts with understanding how painting fits into the overall renovation timeline. If you’re working with a remodeling company, painting should be discussed early—not squeezed in at the end. Likewise, a home remodeling contractor can help identify when surfaces will truly be ready for paint, rather than when they simply look ready.
Think of painting as a dependent task. It relies on several other elements being complete:
- Electrical and plumbing work finalized
- Drywall installed and fully cured
- Flooring decisions confirmed
- Fixtures selected and measured
One homeowner learned this the hard way after painting their newly remodeled living room—only to have electricians return to install additional outlets, cutting into freshly painted walls. The result? Extra labor, extra paint, and unnecessary frustration.
A better approach is to map out your project phases and identify where painting naturally fits. This avoids redundancy and ensures that when the paint goes on, it stays intact.
Another helpful tactic is to create a shared timeline with everyone involved in the project. When contractors, painters, and installers are aligned on the sequence of work, it minimizes miscommunication. Even a simple weekly check-in can prevent costly overlap, especially in larger remodels where multiple trades are active at once.
Preparing Surfaces Thoroughly Before Applying Paint
It’s tempting to skip prep work, especially when walls appear clean or newly installed. But most paint failures—peeling, bubbling, uneven texture—can be traced back to poor preparation.
Even when hiring an interior painting service, it’s worth understanding what proper prep actually involves. It’s not just about wiping down walls. It’s about creating the ideal surface for adhesion.
Preparation typically includes:
- Filling holes, cracks, and seams
- Sanding rough or glossy areas
- Cleaning off dust, grease, or residue
- Applying primer where needed
In remodeling scenarios, surfaces are often more vulnerable than they appear. New drywall, patched areas, or previously hidden damage can all affect how paint behaves.
Imagine painting over a wall that still has fine construction dust embedded in it. The paint may initially look smooth, but over time, it can lose adhesion and begin to flake. That’s the kind of issue that doesn’t show up immediately—but becomes costly later.
Another commonly overlooked step is allowing adequate drying time between prep stages. Rushing from patching to priming, or from priming to painting, can trap moisture beneath the surface. This leads to blistering or uneven finishes that require correction.
Taking the time to prepare surfaces properly isn’t glamorous, but it’s one of the most effective ways to protect your investment.
Selecting the Right Paint for Each Environment
Not all paint is created equal, and using the wrong type in the wrong place is a surprisingly common mistake.
For example, using interior-grade paint outdoors might seem harmless at first. But without the durability and weather resistance of exterior painting products, surfaces can quickly fade, crack, or peel under sun and moisture exposure.
Inside the home, the choice is just as important. High-traffic areas need more durable finishes, while moisture-prone spaces require specialized formulations.
Here’s a quick way to think about it:
- Kitchens and bathrooms benefit from semi-gloss or satin finishes that resist moisture
- Living areas often look best with matte or eggshell for a softer appearance
- Exterior surfaces require UV-resistant, weatherproof coatings
A homeowner once chose a flat finish for their hallway to achieve a modern look—only to realize later that every fingerprint and scuff mark became painfully visible. The fix? Repainting with a more durable finish.
Another factor to consider is how different finishes reflect light. Glossy finishes highlight imperfections but are easier to clean, while matte finishes hide flaws but can be harder to maintain. Understanding this balance helps you make smarter decisions that align with both aesthetics and function.
The key is to match the paint not just to the color you want, but to how the space will be used over time.
Timing Painting Around Major Renovation Work
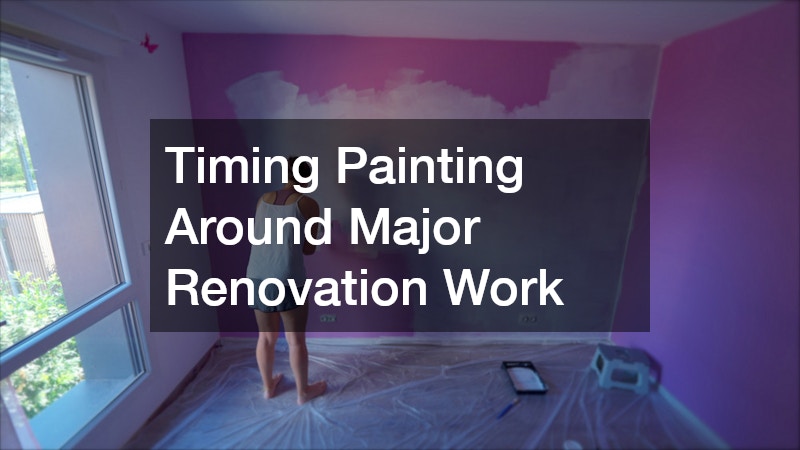
One of the most expensive painting mistakes isn’t about technique—it’s about timing.
Painting too early in a remodeling project almost guarantees damage. Dust, tools, and ongoing work can quickly undo even the most careful paint job.
This is especially true during kitchen renovations or when working with bathroom remodeling contractors. These projects involve multiple trades—plumbers, electricians, installers—all moving through the same space.
If painting happens before cabinets, countertops, or fixtures are installed, there’s a high chance of:
- Scratches and dents in the walls
- Paint splatter from other trades
- Moisture exposure during installations
The smarter approach is to wait until the heavy work is complete, but before final detailing. Painting should come after structural and mechanical tasks, but before installing delicate finishes that could be damaged by paint.
In some cases, it may even make sense to break painting into phases—handling ceilings and base coats earlier, then completing final coats after installations. This staged approach requires coordination but can significantly reduce touch-ups.
It requires patience, but it prevents the need to redo entire sections of your home.
Coordinating Colors With Fixtures and Finishes
Color selection isn’t just about personal preference—it’s about harmony with the elements that won’t change.
Permanent features like flooring, countertops, and especially kitchen cabinet finishes play a major role in how paint colors appear. What looks perfect on a sample card can clash dramatically once applied next to real materials.
A common mistake is choosing paint colors in isolation. Instead, bring samples into the actual space and view them alongside your fixtures at different times of day.
Lighting plays a huge role here. Natural daylight, warm indoor lighting, and shadows can all shift how a color is perceived.
Consider testing a few options directly on the wall:
- Paint large swatches rather than small patches
- Observe them in morning, afternoon, and evening light
- Compare them next to cabinetry and flooring
Another helpful tip is to view samples vertically and horizontally. Colors can look slightly different depending on the angle and surrounding elements, especially near corners or trim.
This process may feel slow, but it prevents costly repainting later. It’s far easier to adjust before committing than after an entire room is finished.
Accounting for Structural Changes in Painting Plans
When a home addition is part of the remodeling project, painting becomes more complex than simply covering new walls.
The challenge lies in blending old and new spaces seamlessly. Differences in lighting, wall texture, and even ceiling height can make transitions obvious if not handled carefully.
For example, a newly added room might receive abundant natural light, making the same paint color appear brighter than it does in the original part of the house. Without adjustment, the two spaces can feel disconnected.
To create a cohesive look:
- Consider repainting adjoining areas, not just the new space
- Match textures as closely as possible
- Use consistent finishes to unify the appearance
Sometimes, the issue isn’t color but sheen. A slight difference in finish—like satin versus eggshell—can create visible contrast even if the color is identical.
In some cases, slight variations in color can actually help define spaces—but that should be intentional, not accidental.
Ignoring these details often leads to a patchwork effect that diminishes the overall impact of the remodel.
Choosing the Right Professionals for Complex Projects

Painting during a remodel isn’t always a DIY-friendly task. The more moving parts involved, the more valuable experienced professionals become.
Working with local general contractors can help ensure that painting is properly coordinated with other trades. They understand sequencing, timing, and how to protect finished surfaces during ongoing work.
Similarly, a home remodeling contractor can identify potential issues before they become visible problems—like moisture risks, structural imperfections, or compatibility between materials.
Hiring the right professionals doesn’t just improve results; it reduces stress. Instead of juggling multiple schedules and responsibilities, you have someone overseeing the process holistically.
That said, not all contractors are equal. Take time to ask:
- Have they handled painting within remodeling projects before?
- How do they protect finished surfaces during construction?
- What is their process for quality control?
It’s also helpful to review past project photos or request references. Seeing how a contractor handles details—like clean lines, smooth finishes, and consistent color application—can give you confidence in their work.
The answers can reveal whether they’re prepared to handle the complexities of your project.
Considering Exterior Factors That Affect Paint Longevity
Exterior paint doesn’t exist in isolation—it’s constantly exposed to environmental conditions. One often-overlooked factor is the condition of the roof.
A failing roof can introduce moisture that seeps into walls, undermining even the best exterior painting efforts. Before painting, it’s worth consulting a roofer to ensure there are no leaks, damaged shingles, or drainage issues.
Water is one of paint’s biggest enemies. It can cause:
- Bubbling and blistering
- Mold or mildew growth
- Premature peeling
Even something as simple as clogged gutters can redirect water onto freshly painted surfaces, shortening their lifespan.
Temperature and humidity also play a role. Painting in extreme heat or during high humidity can affect drying times and adhesion, leading to uneven results.
By addressing these issues first, you create a stable foundation for your paint job. It’s a step many homeowners skip—and one that often leads to repainting sooner than expected.
Budgeting Realistically to Avoid Cutting Corners
Painting might seem like a place to save money, but cutting corners here often leads to higher costs down the line.
A remodeling company will typically advise allocating a realistic portion of your budget to painting, including materials, labor, and potential touch-ups.
Lower-quality paint may require more coats, wear out faster, and fail to provide the finish you’re hoping for. Similarly, rushing the job to save on labor can result in uneven application or missed details.
A more effective approach is to budget with longevity in mind. Consider:
- Investing in high-quality primer and paint
- Allowing time for proper drying between coats
- Planning for minor touch-ups after the project is complete
It’s also wise to set aside a small contingency fund specifically for painting adjustments. Unexpected issues—like discovering damaged drywall or needing additional coats—are common in remodeling projects.
Think of painting as a finishing investment rather than a final expense. It’s what people notice first—and what they’ll continue to see every day.
Inspecting the Final Results Before Signing Off

Even with careful planning, mistakes can still happen. That’s why a thorough final walkthrough is essential.
If you’ve hired an interior painting service, this is your opportunity to review their work closely before considering the job complete.
Instead of a quick glance, take a methodical approach:
- Check walls in both natural and artificial light
- Look for uneven coverage or streaks
- Inspect edges around trim, ceilings, and fixtures
- Run your hand lightly over surfaces to detect rough spots
It’s also helpful to view the space from different angles and distances. Sometimes imperfections only become visible when you step back.
Don’t hesitate to use painter’s tape to mark areas that need attention during the walkthrough. This creates a clear, visual checklist for corrections and ensures nothing gets overlooked.
Addressing issues at this stage is far easier than revisiting them weeks later. Most professionals expect this step and are willing to make adjustments to ensure satisfaction.
Bringing Everything Together for Lasting Results
Avoiding costly painting mistakes during a remodeling project isn’t about perfection—it’s about awareness and preparation. Each decision, from timing to materials to coordination, plays a role in the final outcome.
When painting is approached as an integral part of the remodeling process rather than a finishing touch, the results speak for themselves. Walls look smoother, colors feel intentional, and the entire space comes together more cohesively.
By planning ahead, working with the right people, and paying attention to detail, you can ensure that your paint job enhances your remodel—rather than becoming a costly setback.